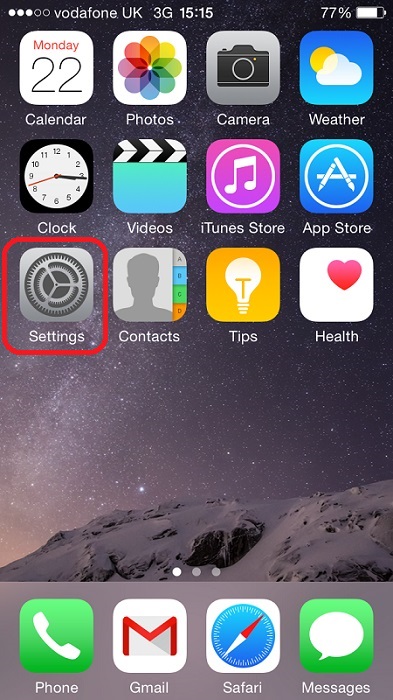
1.
Locate and click on Settings from the home screen
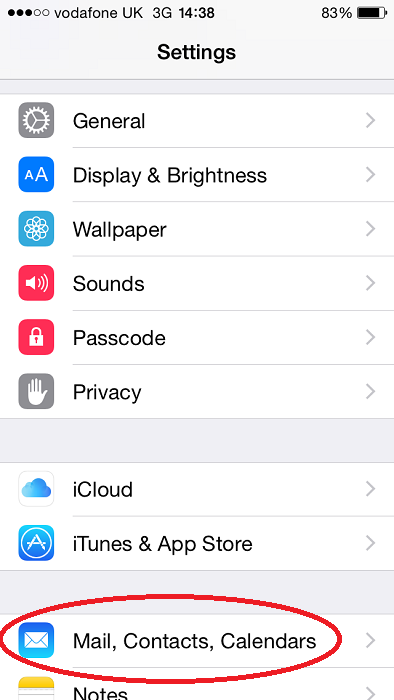
2.
Scroll down to Mail, Contacts, Calendars
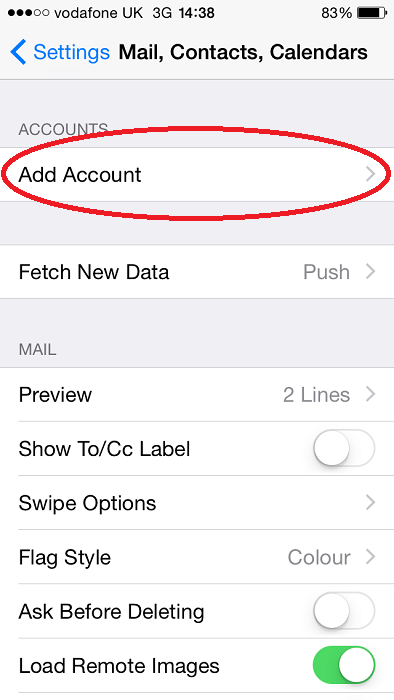
3.
Tap Add Account
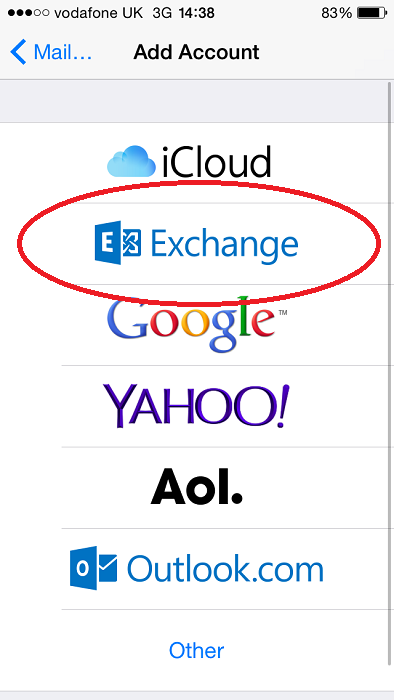
4.
You will be presented with several options. Select the 2nd one down. Exchange
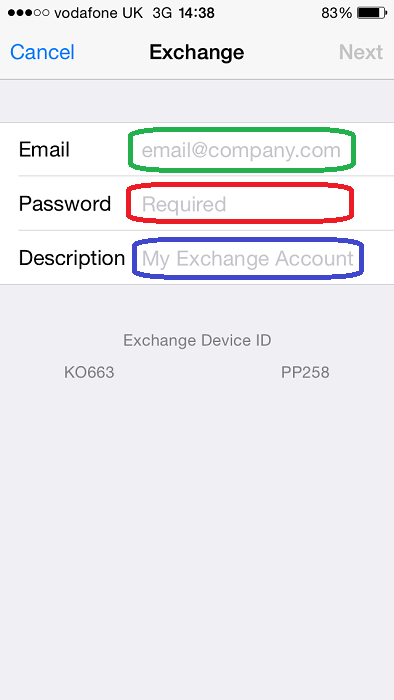
5.
Now its time to enter your Company login credentials and Exchange details
Email: youremailaddress@yourcompanyemail.com.au
Password: yourpassword
Description: Work Email (Or whatever you want to call it.).
For this example we have called it Exchange|
*Tap Next on the top right when done.
6.
You will then be presented with another screen which looks similar to the last (shown below) but it will have some more fields to fill in
In the Server field enter: phoenixexchange.cymax.com.au
Domain : can be left blank
Username : Will be provided to you by Cymax. This is the same username you would used to login to the Cloud.
Password: Provided by Cymax. This is the same password you would use to login to the Cloud.
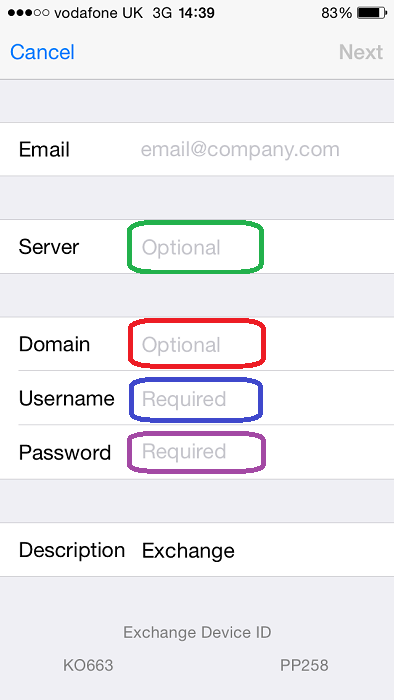
Logon
Tap Next. It will then try and validate your account details.
7.
Once validated, select the items you want to sync. We recommend leaving all of these enabled.
Tap Save when done.
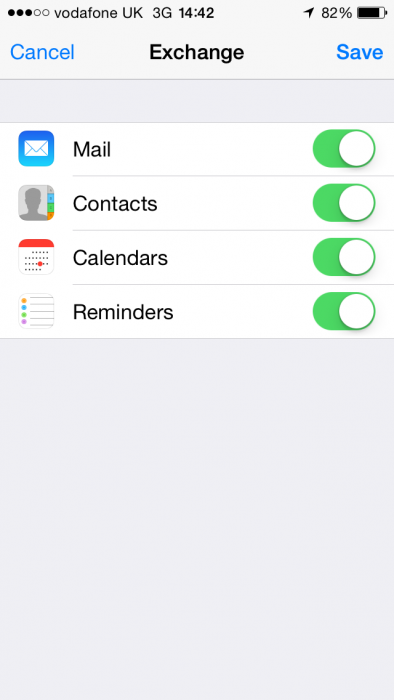
Your work email should now begin to sync.